Acerca de
What is Laser Cutting and How does it work
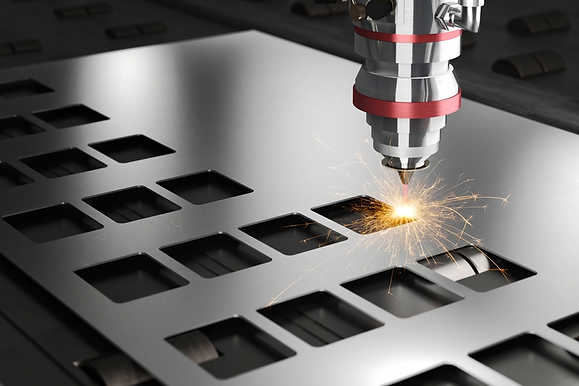
Laser cutting is a technology that uses a laser to vaporize materials, resulting in a cut edge. While typically used for industrial manufacturing applications, it is now used by schools, small businesses, architecture, and hobbyists. Laser cutting works by directing the output of a high-power laser most commonly through optics. The laser optics and CNC (computer numerical control) are used to direct the material or the laser beam generated. A commercial laser for cutting materials uses a motion control system to follow a CNC to be cut onto the material. The focused laser beam is directed at the material, which then either melts, burns, vaporizes away, or is blown away by a jet of gas, leaving an edge with a high-quality surface finish.
How it works
The laser beam is a column of very high intensity light, of a single
wavelength, or color. The beam is usually only about 3/4 of an inch
in diameter as it travels from the laser resonator, which creates the
beam, through the machine’s beam path. Focusing the laser beam
can be done by a special lens, or by a curved mirror, and this takes
place in the laser cutting head. The beam has to be precisely focused
so that the shape of the focus spot and the density of the energy in
that spot are perfectly round and consistent, and centered in the nozzle.
By focusing the large beam down to a single pinpoint, the heat density
at that spot is extreme. Think about using a magnifying glass to focus the
sun’s rays onto a leaf, and how that can start a fire. The high power density results in rapid heating, melting and partial or complete vaporizing of the material. On a CNC laser cutter, the laser cutting head is moved over the metal plate in the shape of the desired part, thus cutting the part out of the plate. A capacitive height control system maintains a very accurate distance between the end of the nozzle and the plate that is being cut. This distance is important, because it determines where the focal point is relative to the surface of the plate. Cut quality can be affected by raising or lowering the focal point from just above the surface of the plate, at the surface, or just below the surface.

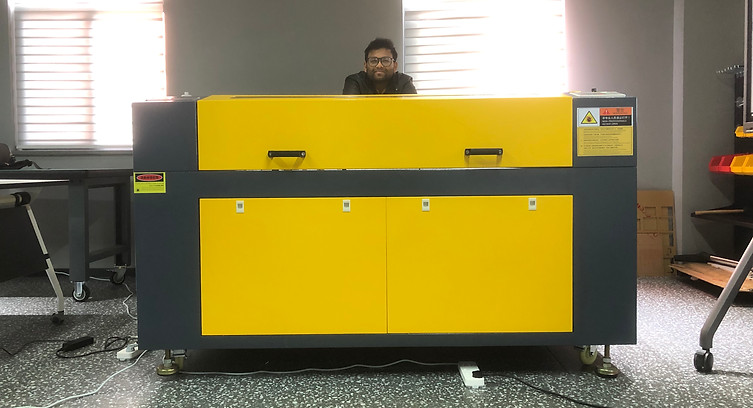
Hardware and Machine
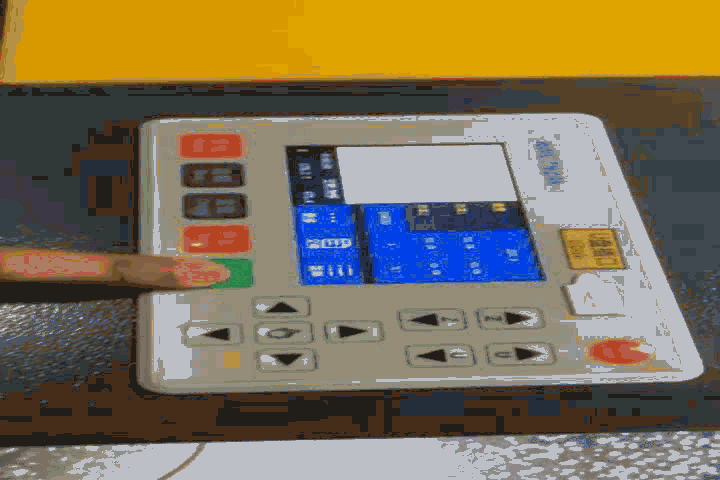
For our work we are using a industry use laser cutting machine to cut arcelic plastic boards. The machine has AWC7824K digital display control panel for CNC. For designing and guiding software, LaserCAD v.18 is preferred. It has central control to move the laser and up down the platform.

Software
We are gonna use LaserCad v.18 for designing and CNC cutting process. LaserCAD running under Windows, integrates composing with importing files into panel. User-friendly and versatile. Compatible with CorelDraw and Auto CAD. Support the file format like AI, PLT, DXF, etc.and Basic graphic drawing
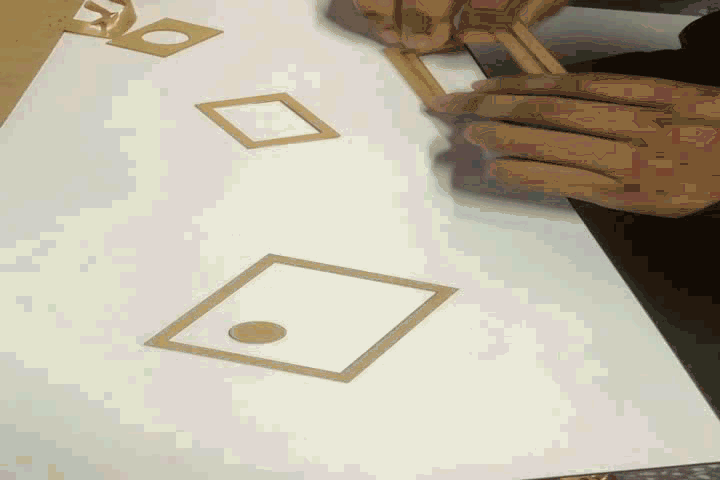
Our Pilot Project
For our first project with designing and laser cutting using LaserCAD, we are are going to finish a simple task.
Step 1 - The Design
The objective is to design a 7 layer square with a circle in the middle of the smallest square. For the dimensions, the outer square is 80mm and the each next layer is little smaller. Note that when setting the dimension, be cautious about the size of the platform. At first we set our dimension 800mm which is much much bigger and not convenient.
For the cutting parameter, the laser speed is set at 50. For each layer we set different power for laser.


Step 2 - Configure the Hardware
In order to have a smooth precision cut, a user should follow a certain procedure.
-
Turn on the machine and wait of CNC display to boot up
-
Do not turn on the laser untill all the precautions are taken
-
Link the machine with computer and check the COM line.
-
Upload the design.
-
Set the origin point and visualize the box.
-
Check for the focus point of laser. Adjust the platform height for a perfect cut.
-
Turn on the air extracting machine to avoid burn smell.
-
Set the machine and close the lid.
-
Make sure no one looks at the laser when it's on since it's very harmful for eyes.
-
Turn on the laser, start the procedure and initialize cut. It'll take about 30 second for our design.
-
After it's done, wait 1 minute to cool down.
-
Make sure to turn off the laser before collecting the thing.
Our Result
For our task, we set the speed at 50 and different layer had different power level. The table shows which power and speed successfully cut off the layer.

Credits
Laser cutting simulations and cutting done by-
MD SEZADUR RAHMAN - 22151470
MD FARHAD HOSSAIN - 22151447
Let’s Work Together
Get in touch so we can start working together.